Happy Friday all!!! The weekend is right around the corner and so is pool time. Picked up some algaecide today to prepare for the opening early in May. We'll be swimming by May 2-4 Yahoo!!!
Went to Scrapfest last Saturday for the first time ever! You have to go, it's an absolute must for any scrapper or card maker and make sure you've saved your pennies because let me tell ya...you'll want everything. It would be nice if they had a 2 day event for shoppers because it's just so packed first thing in the morning...well, all day really! Wendy and I stopped only once for lunch and luckily at a table where we enjoyed doing a couple make n takes by...Memory Box? I think!. We were totally intrigued by everything at Scrapfest and took the whole day to see most everything. Some booths you could not get close enough to to see what was even going on, so you just move on and then go back when things settle down. We visited a couple ladies over at the other ajoined arena where they were busily scrapping and getting work done. A total 2 day event for them from early, early to late, late. I'm considering going next year but I would have to take so much stuff!
April 5 class we did "window wells". Now I don't have those fabulous die cuts to make window wells so I engineered a way to make them look the same and McGivered the window boxes as well. I followed the look of some fab cards done by Loll Thompson here... http://stampingwithloll.blogspot.ca/search?updated-max=2012-03-31T11:58:00-07:00&max-results=7&start=7&by-date=false scroll down to see her cards on her blog
I really have no idea how she made her boxes but I just made rectangles and put them together , some score lines and snips with the ticket punch and voila. Mounted with dimensionals.
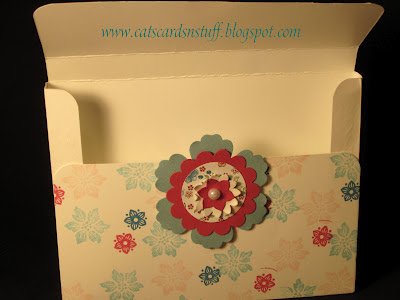
I want to also share with you a card I received from one of the ladies who comes on Thursday card nights. Loretta made a wonderful Thank You card for me. I had signed her birthday card about a week earlier along with some other wonderful ladies. They had purchased Loretta a really fab purse!
She did a fab job I just had to share with you.
I'll be back with some more updates on more cards we did over the last couple weeks.
Thanks for stopping by!
Went to Scrapfest last Saturday for the first time ever! You have to go, it's an absolute must for any scrapper or card maker and make sure you've saved your pennies because let me tell ya...you'll want everything. It would be nice if they had a 2 day event for shoppers because it's just so packed first thing in the morning...well, all day really! Wendy and I stopped only once for lunch and luckily at a table where we enjoyed doing a couple make n takes by...Memory Box? I think!. We were totally intrigued by everything at Scrapfest and took the whole day to see most everything. Some booths you could not get close enough to to see what was even going on, so you just move on and then go back when things settle down. We visited a couple ladies over at the other ajoined arena where they were busily scrapping and getting work done. A total 2 day event for them from early, early to late, late. I'm considering going next year but I would have to take so much stuff!
April 5 class we did "window wells". Now I don't have those fabulous die cuts to make window wells so I engineered a way to make them look the same and McGivered the window boxes as well. I followed the look of some fab cards done by Loll Thompson here... http://stampingwithloll.blogspot.ca/search?updated-max=2012-03-31T11:58:00-07:00&max-results=7&start=7&by-date=false scroll down to see her cards on her blog
I really have no idea how she made her boxes but I just made rectangles and put them together , some score lines and snips with the ticket punch and voila. Mounted with dimensionals.
Now the cards below have a hand made window (rectangle with four windows cut out) with the top portion of the window the same as the top portion of the window box (see upper cards), and then I added the window box to the bottom. Both the windows have velum behind them as well as a brick wall embossed, perfect plum background and Whisper white card base. In the right card, all layers were cut to make the window look as real as possible and you can see vaguely what is on the inside of the card but the left one does not go through all three layers of card. One of the brick layers was slightly sponged with Crumb Cake.
I want to also share with you a card I received from one of the ladies who comes on Thursday card nights. Loretta made a wonderful Thank You card for me. I had signed her birthday card about a week earlier along with some other wonderful ladies. They had purchased Loretta a really fab purse!
She did a fab job I just had to share with you.
I'll be back with some more updates on more cards we did over the last couple weeks.
Thanks for stopping by!


