Friday, 22 November 2013

Birds of a Feather

Well, another week or two has gone by.  The time is nearing very quickly and everyday seems to go faster as we approach December. We will be celebrating my daughters 21st birthday in a week and then Christmas will be here.
A few weeks back as I was trying to get rid of 1/2 made cards, well not get rid of but complete, I finished these two sets of cards I'd like to share.
I had borrowed last year or maybe even two years ago a bird stamp from a friend and I went crazy stamping images on watercolour paper. I was clearing up about two to three years of unfinished cards and came up with these. Hope you like.


I'm not sure where I came up with the design or even if I CASED or not. I used the new SU Candy Dots(LOVE 'EM) on the red cards but in different spots to change things up a bit. I was impressed!

Wednesday, 30 October 2013

Halloween and Washi

BACK AT IT!

     Holy COW! I cannot believe that it has been almost a year since my last blog. Well, I can believe it actually with all that has happened since last year. Won't go into any major details but I have been very busy taking care of other things and not myself or my love of crafts.
     Really, truly, it is the only thing that keeps me completely sane and I am a happy camper when I'm doing it, working with it, designing and such.
     I recently when to Scrapfest in Oshawa with my good friend Wendy and was very inspired to create.  I left with some fabulous make n takes and wanted to get right back at teaching, el pronto!
     First on the list was the bag toppers for Halloween in our class.  We were chatting about various things and the topic of washi tape came up.  My ladies asked "what's washi tape?" WHAT? Well, we'll just have to do some of those washi tape cards.  Second week was some Washi tape cards.
     I must confess, when washi tape first came out I didn't like it at all. Not one bit. You'll never catch me buying washi tape! Well, that's how it goes with me. I don't like something and before you know it I'm in love with it.  Takes me a while to warm up to things completely out of my comfort zone. Oh, ya, and that gorgeous grunge stuff...yuck, yuck yuck.  Well I absolutely love it now.  In the meantime I thought not to spend a whole lot of $ on something I hate, I went to the local dollar store and picked upsome cheap stuff.  Turns out, I like it lots and am now going to get the Stampin Up good stuff.  I've learned from experience...buy the good stuff cuz the crap will turn out crap in the end. Anyways, here's my toppers and my take on a couple CASE cards that I saw in the last week using some inexpensive goods and some great SU stuff.


Thanks for stopping by!

Saturday, 1 December 2012

Sparkle & shine

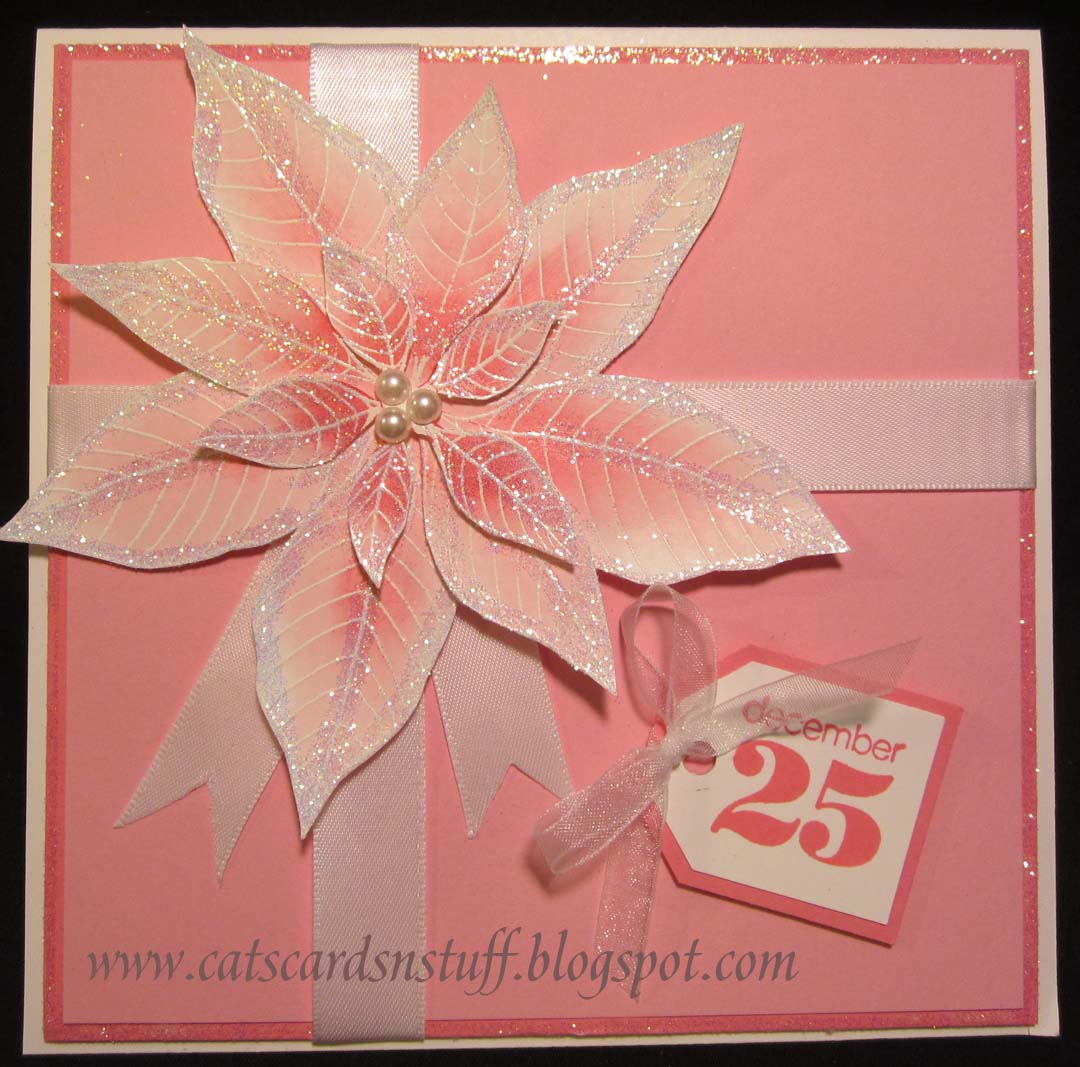
I just love glittet. Glitter, glitter, glitter. It just adds that special shine to a card to make it look so elegant.
The following cards are from Thursday class, the wee few we had and I'm pretty sure they loved them with their ooohs and ahhhs again!
The pictures really don't do them much justice as they are gorgeous in person.


6 x 6 in card
Very Vanilla, Crumb Cake & Bashful Blue
Poinsettia stamped (non SU) and embossed on/with White


Whisper White, Regal Rose, Pretty in Pink
 

Cased from Doni High at limegreengiggles.com
 
 
Hope you like what you see...drop me a line!

Friday, 12 October 2012

Class Cards

Card Shares

Here I thought I had gone and posted all kinds of cards we made in class. NOT...OOPS!
I case a lot of my cards, however, I can't always remember who they come from so because of that, I'm sorry for not giving credit due. Well, here are some of the cards we did during Octobers classes:

Embellishing with dryer sheets


 Daisies 2 Flower die - 3 layers of each size and glitterized!
Dryer sheet technique used here.

 
Another flower made with dryer sheets and then glitterized.
 

Bigz Snow Flurry Die  using dryer sheet technique
 
So much fun doing these cards

Acrylic Block Backgrounds

Again, we had so much fun using different size blocks to make some really lovely backgrounds.


I was demonstrating how you could use a block to make a checkerboard background and use the layer to enhance the rest of your card.  I came up with this card after class.  I love it and think it's so cute!

Shaker Cards

 
snow glitter

 
Again, snow glitter

 
Candy - cake sprinkles
I love Christmas and there are so many Christmas cards that can be made so I tend to demo them in my technique classes this time of year.


Ribbons Galore

Below are two cards using scraps and pieces of ribbon
Our first card we glued ribbon to card stock using the double sided adhesive sheets and cut them out with the die cutter. (I don't have a Big Shot yet) and the second card we used  the blossom punch and glued the ribbons to the back of the card front. 


I know there is a lot of cards to take in on this one particular blog but thanks for stopping by and looking.  Love to hear your comments!


Sunday, 23 September 2012

One Layer WOW - Butterfly

Quite a few people have asked me to share how I made my card for the challenge 190 and I am very happy to share.  I hope I can make your life easier and convenient for crafting, teaching or demonstrating. I took my inspiration from a small note card I saw somewhere and I cannot track down the original and I don't know who made it, but it was so cute and an inspiration to me. I'm thrilled to pass it on to you. I have also done one in Pretty in Pink as well as Wisteria Wonder.


So now on to the tutorial
 
Materials
Card Stock - Whisper White
Ink - Wisteria Wonder, Crumb Cake
Stamps - 'All a Fltter', 'So Happy for You'
Tools - sponge, Stampin Write Marker;Wisteria Wonder, Blender Pen
 
I made a template from plastic and put removable glue on back so I could use it several times.  1/2" masking all around standard size card of 8.5 x 5.5" folded in half.
Then I stamped the background in Crumb Cake with a stamp similar to SU En Francais or you could use a wheel for the background like Travel Journal.
In a circular motion sponge around the outer edges of the card.
Go all around as many times as needed to get the colour depth you want leaving the middle white or slightly covered with colour.
Stamp your image with black Stazon.
With your marker shade in the top and bottom rows of the wings and then take your blender pen and highlight the inner portion of the wings. I like the look and colour of the blender pen when I ink so the top and bottom parts of the wing, if I were to make more, would be done that way but shaded darker.  Here the marker makes it look bluish.Whatever you prefer I suppose.
Remove the mask and add your glue then glitter to body and parts of wings. This pic shows Glitter Ritz.
This pic shows Dazzling Diamonds coloured with a drop of Wisteria Wonder reinker. Just mix the 2 together really good, let dry and use like normal glitter. Can match glitter to any ink colour you have with your reinkers!
Add sentiment to card and sponge around for added effect if you like or keep edges clean.
There it is folks! Have fun creating!
 
If you would like a PDF tutorial, please email me. Or if someone knows how I add it to my blog, help me please!


Friday, 21 September 2012

Snip & Tuck

I think this technique is way cool and I give credit to Julie Davison and her blog is http://juliedavison.blogspot.ca/    Julie uses 12"x 3" and folds in half for a 6x3 card when done. Here are my takes on her styles and have made a standard A2 card and cut one to fit an elongated envelope I have as well.  That card measures 3 3/8 x 6 1/4 I have tons of envelopes of different sizes and I really like the idea of custom making a card for the envelope, so, that's what I did in the case of the Happy Graduation card.
So tada..

 Naturals White, Primrose Petals, Raspberry Ripple & Ink, Gumball Green Ink


Crumb Cake, Naturals White, Early Espresso, Soft Suede Ink, Marina Mist Ink
More of a masculine take on this type of card...
 
After stamping the world, I took a blending pen and pulled it over the ink and coloured the land portion of the world then I took my aqua painter and some Marina Mist watered down and coloured in the water areas on the map
 
 
I just love demonstrating new ideas!!! We did these at last nights class.
Hope you like them.
There were only 3 of us last night and with that, I always seem to have time on my hands to make myself some cards. So, while I was sitting and talking, this idea popped into my head and I had to go with it.  What ya think?


Thanks for looking

Thursday, 20 September 2012

Pay It Forward

Pay it forward game still going on.  Please see posting dated June 14